

What is this?
Custom Fields let you store additional information about your contacts beyond the default details. You can collect and reuse this data across contacts, automations, WhatsApp Flows, ask steps, and campaigns.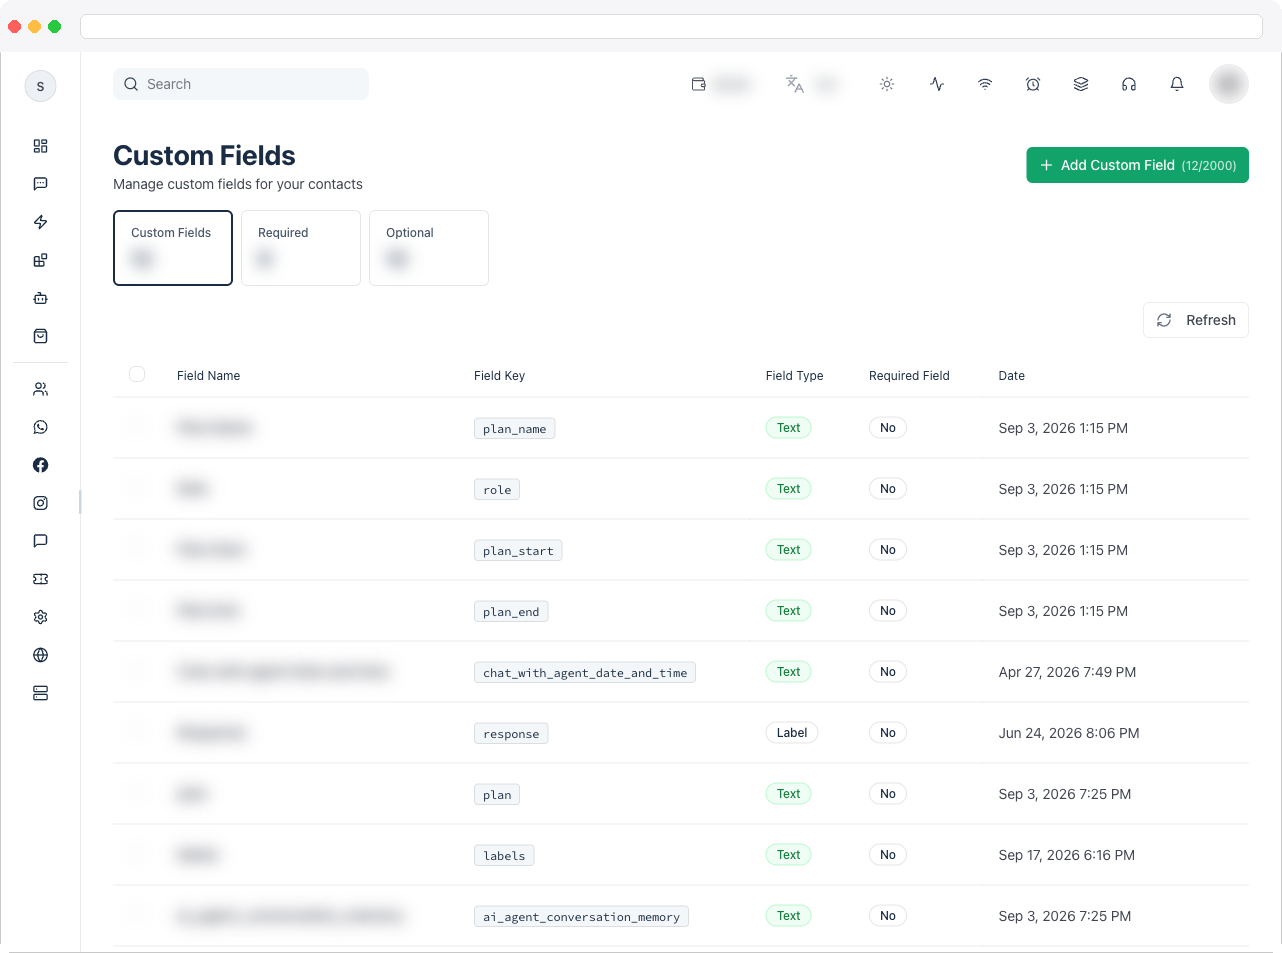
Custom Fields require the
custom_fields:view permission and a channel. The number of fields you can create depends on your plan and is shown on the Add Custom Field button.What can I do here?
- Store customer details collected from conversations
- Capture answers from automation ask steps
- Save data submitted through WhatsApp Flows
- Segment contacts by stored values, and personalize future messages and campaigns
- Store dates, times, links, images, videos, and files as well as text and numbers
- Set a Priority to control the order fields appear in the contact panel
- Search the Field Library and filter with the Required and Optional tiles
- Add Custom Field, Edit or Delete fields, or Delete Selected in bulk
Field Library
The library lists every custom field in the workspace:
By default the list is ordered by Priority, lowest first, then by name — the same order the fields have in a contact’s panel in the Inbox.
Field types
For Image, Video, and File fields you can upload from your device. Images accept JPEG, PNG, GIF, and WebP; videos accept MP4, WebM, Ogg, and 3GPP; files accept PDF, plain text, and Word, Excel, and PowerPoint documents.
How to use it
Create a custom field
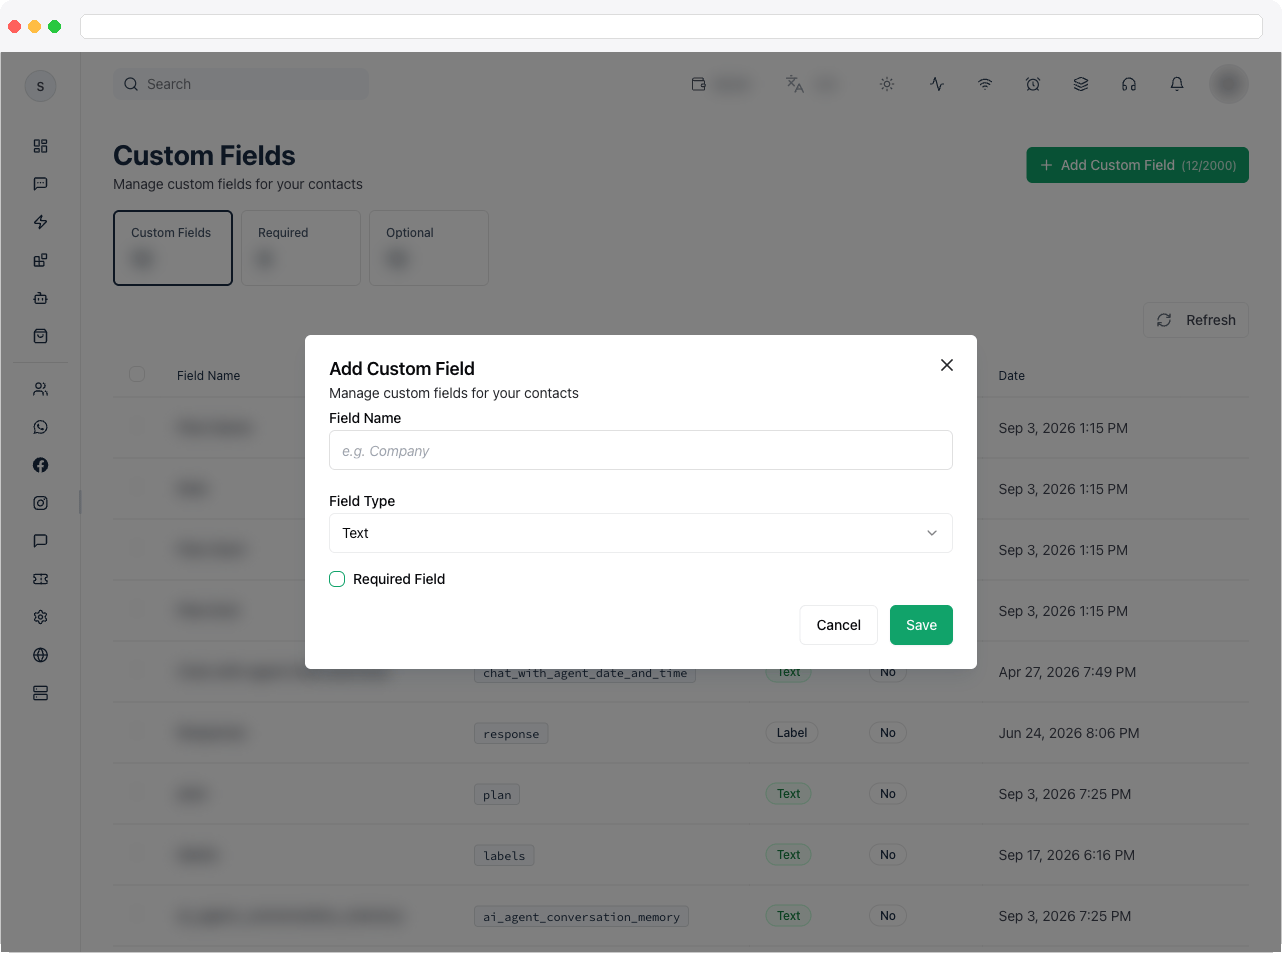
- Go to Contacts → Custom Fields and click Add Custom Field.
- Enter a Field Name — for example “Company” — and choose a Field Type.
- Optionally set a Priority — a whole number from 0 up. Lower numbers appear first in the contact panel. Leave it empty to put a new field last, or to keep an existing field where it is.
- For a Dropdown or Label field, enter the allowed values, one per line. Team members search and select only from this list, and Label fields support multiple selections. Each value must be unique.
- Choose whether the field is Required.
- Click Save.
Fill in a custom field on a contact
Open a contact’s panel in the Inbox (or the contact’s details page), click the pencil beside a field, and enter the value. Each field shows its Field Key next to its name.- Date, Time, and Date & Time fields open the matching date and time pickers.
- URL fields must be a valid
http://orhttps://link — anything else is rejected with “Enter a valid http(s) URL”. - Image, Video, and File fields show Upload (or Replace when a value already exists) and Remove. Once saved, an image shows as a thumbnail, a video as a player, and a file as a link you can open.
Common uses
- Automation ask steps — when an automation asks a customer for a company name, city, requirement, or preferred time, the answer can be saved into a custom field on the contact.
- WhatsApp Flows — data collected in lead, booking, inquiry, feedback, and support forms can be mapped into custom fields. See Flows.
- Contact segmentation — filter and group contacts by city, company, customer type, interest, or lead source.
Recommended workflow
- Create the custom fields you need before building automations or flows.
- Use ask steps or WhatsApp Flows to collect the data.
- Store responses in the correct fields.
- Use the saved values for segmentation, personalization, and follow-up.
Troubleshooting / Technical Notes
- “Field name is required” or “Field type is required.” Fill in both before saving.
- “Priority must be a non-negative whole number.” Enter 0 or a positive whole number, or leave Priority empty.
- “Enter a valid http(s) URL.” A URL field only accepts links that start with
http://orhttps://. - “Upload failed.” The file couldn’t be uploaded. Check that it matches the allowed formats for the field type — an Image must be an image file and a Video must be a video file — and try again. You need the
contacts:editpermission to upload. - A value sits on a contact with “Custom field definition missing.” The contact has data stored under a key that has no custom field any more (for example after a field was deleted, or from an old import). On the contact’s details form, click the + button — Create custom field for this key — to create a text field for that exact key and reconnect the value.
- “Remove duplicate values from the allowed list.” A dropdown can’t contain the same value twice.
- “Upgrade your plan.” You’ve reached your plan’s custom-field limit.
- Deleting is permanent. Deleting a field removes the field and also deletes its stored value from every contact — it can’t be undone. Don’t delete fields that are used in active automations or flows.