

What is this?
Contacts is the single database of every customer record in your workspace — with search, filters, labels, status, and per-contact actions like Assign, Chat, Block, and Delete.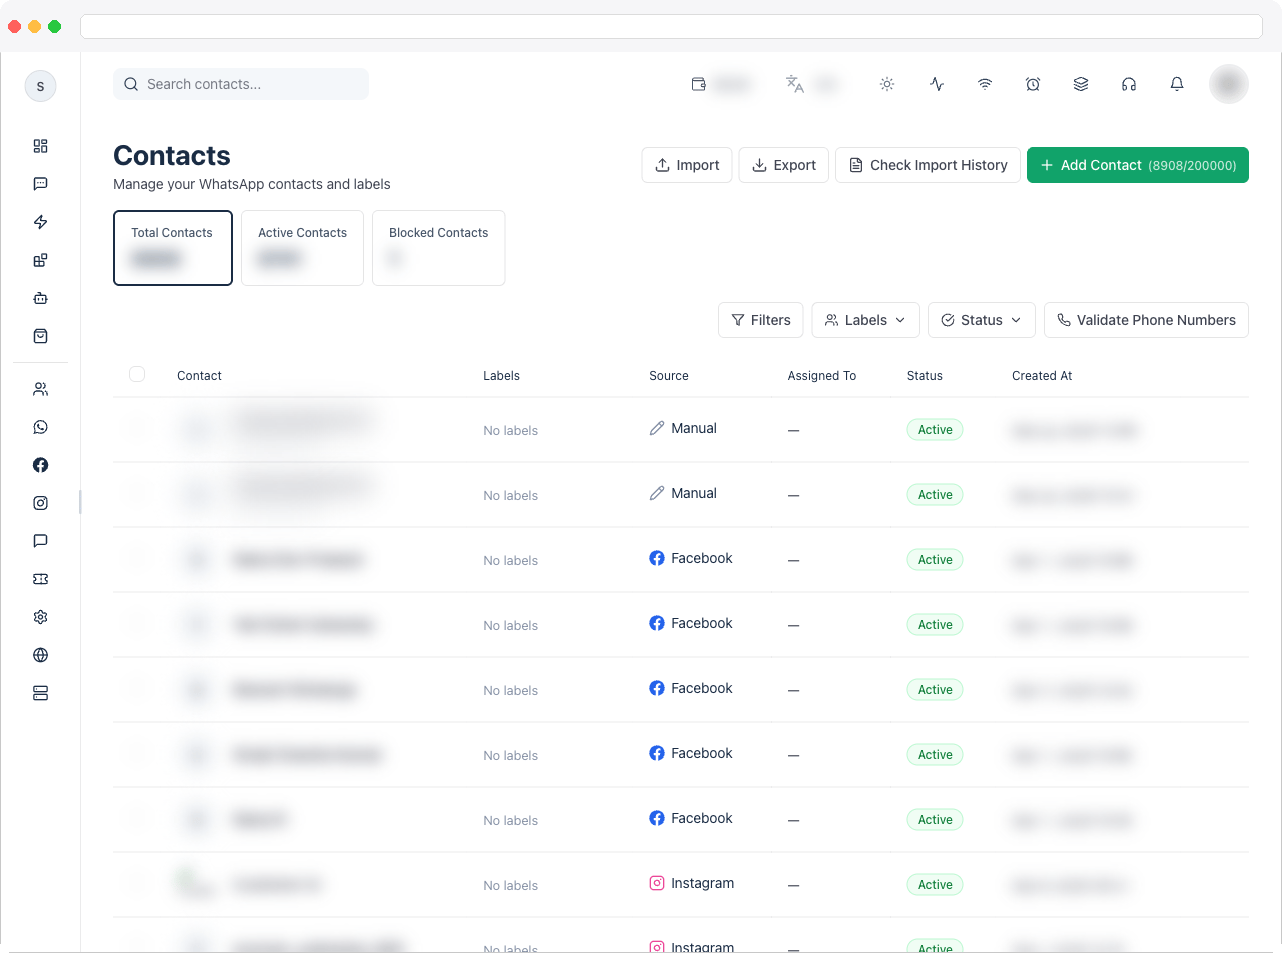
What can I do here?
- Search contacts (the search box filters by name/phone as you type)
- Filter by Labels and Status (Active, Blocked, Unsubscribed) from the toolbar dropdowns
- Open Filters for advanced search: Name, Email, Phone, Assigned Team Member, Custom Field + value, Source, and a created-date range
- Add a new contact with Add Contact (Name, Email, Phone, and a required consent confirmation)
- Import contacts from a CSV or XLSX file with a step-by-step wizard — map your columns, apply labels, choose how to handle duplicates, and import in the background
- Check Import History to see the status of background import jobs, and watch a running import in the progress panel in the corner of the screen
- Export all contacts (emailed to you as a file) or Export Selected for just the checked rows
- Check phone number — runs a background validation pass on phone numbers for the active channel
- From a contact’s row menu: View Contact, Assign Contact to a teammate, Chat (jumps to that contact’s conversation in Inbox), Block Contact / Unblock Contact, and Delete
- Select multiple contacts to Export Selected, Assign Label, or Delete Selected in bulk

How to use it
1
Add a single contact
Click Add Contact, fill in Name and Phone (pick the country code first), optionally Email, then check the consent confirmation box. The Add button stays disabled until all three — name, phone, and the consent checkbox — are filled in.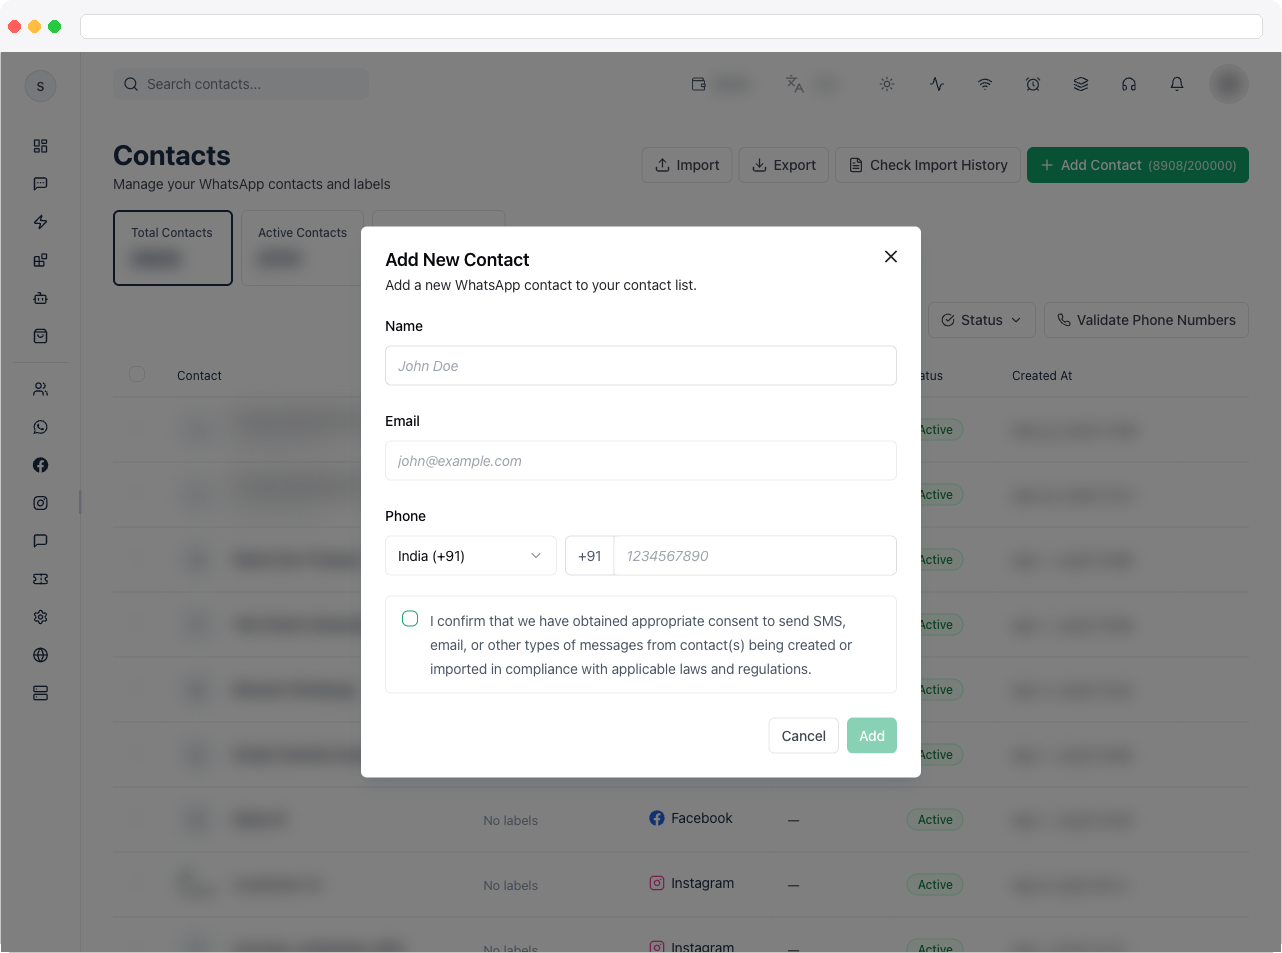
2
Import contacts in bulk
Click Import to open the Import Contacts wizard. It has five steps, shown along the top: Upload, Map Columns, Enrich, Confirm, and Import. See Import contacts below.
3
Track the import
The import runs in the background — close the wizard and keep working. A progress panel in the corner of the screen shows Importing contacts while it runs and Contact import finished when it is done. Click Check Import History (or Import history in the wizard) to see each import job’s status and retry a failed job.
4
Act on a contact
Click the ⋯ menu on any row to assign it to a teammate, jump into its conversation via Chat, or block/delete it. Use the checkboxes and the bulk action bar to label or delete several contacts at once.
Import contacts
1
Upload
Read the notes at the top: supported formats are .csv and .xlsx, the required column is Phone Number (Name is recommended), phone numbers must include the country code (for example +1 or +91), and you can map your column headers in the next step. Click Download Sample Template if you want a ready-made file, then drag and drop your file or browse for it.
2
Map Columns
The wizard shows how many rows and columns it found, and lists each File Column Header with a Destination Field. It matches columns automatically (marked Auto), and each shows a sample value. Change a destination to Name, Phone Number, Email, Label, one of your existing custom fields, New custom field (use header) to create a field from the column header, or Don’t import. Phone Number is required — Continue to Enrich stays disabled until a column is mapped to it. If nothing is mapped to Name, the phone number is used as the contact name. A preview of the first rows is shown below.
3
Enrich
Under Apply Labels, choose labels to add to every contact in this import (in addition to any labels mapped from file columns). Under Duplicate Handling, choose how contacts with matching phone numbers are treated: Skip duplicates (Recommended) keeps existing contact data untouched, while Update existing contacts updates their details with the new values from your file and adds the labels.
4
Confirm
Review the Import Configuration Summary — file name, total rows, mapped columns, duplicate strategy, and labels applied — and the Confirmed field mapping table showing each file header, its target field, and whether it is Mapped or Skipped. Click Start Import.
5
Import
The import is queued and runs in the background. You can click Run in background and keep working, or watch the counts — New, Updated, Skipped, and Failed — update as rows are processed. When it finishes, click Done.
Troubleshooting / Technical Notes
- Add Contact stays disabled. All of these must be true: the consent checkbox is checked, a country code is selected, Name is filled in, and Phone is filled in. The button is also disabled briefly while a contact is being created.
- The consent checkbox is mandatory when adding a contact. Its wording is fixed: “I confirm that we have obtained appropriate consent to send SMS, email, or other types of messages from contact(s) being created or imported in compliance with applicable laws and regulations.” If someone can’t add a contact, check this box first. The import wizard has no consent checkbox, so make sure you have consent for the people in your file before you import it.
- “Unsupported file type. Upload a .csv or .xlsx file.” The wizard only accepts .csv and .xlsx files. Save your spreadsheet in one of those formats and upload it again.
- “The file could not be read.” The file is damaged or in an unexpected format. Download the sample template and compare, then try again.
- “Continue to Enrich” is disabled. No column is mapped to Phone Number yet. Choose the phone column in Map Columns.
- Some rows were not imported. Check the Skipped and Failed counts in the import progress. Skipped rows are contacts that already exist (when Skip duplicates is chosen). For failed rows, check that every row has a phone number with its country code, then use Import history to see the job and retry it.
- “The import could not be started.” The upload didn’t reach the queue. Go Back to Confirm and click Start Import again.
- The Chat row action is disabled. No WhatsApp channel is configured for the workspace, or the contact has no phone number.
- The Assign Contact action is disabled. It requires the
inbox:assignpermission. - Block Contact or Unblock Contact isn’t shown. It’s only available for contacts on WhatsApp or Facebook. For other channels, such as Instagram and Web Chat, the option is hidden entirely.
- The page says “Please select or create a channel first.” No active channel is selected. Go to Channels.
- The page shows an upgrade message. WhatsApp integration is blocked by your current plan.
- Creating a contact fails. The message from the server is shown when there is one, otherwise “Failed to create contact.”
- Export was started but nothing arrived. Exports are emailed to you as a file when they finish. The page doesn’t show a download link or an expected delivery time, so check your email and spam folder.